
Delivery*
Free for orders $200 & above!
GeoSOL - GeoAlarm Outdoor Solar Panel (for GeoCAM Security Camera and GeoVDBC Video Doorbell)
GeoAlarm GeoSOL Solar Panel Description:
The GeoSOL is a outdoor solar panel designed to provide power to the GeoAlarm battery-operated security camera (GeoCAM) and/or the GeoAlarm battery-operated video doorbell camera (GeoVDBC-B). With the GeoSOL installed, users can more easily setup the cameras and avoid having to run wires to provide power to the cameras in hard to install locations.
Product Features:
- Designed for GeoCam Indoor/Outdoor Security Camera
GeoAlarm GeoSOL Solar Panel Specifications:
- Dimensions (H x W x D): 6.61 x 7.20 x 0.67 in. (167.89 x 182.88 x 17.02 mm)
- Weight: 11.53 oz. (w/accessories)
- Wired: 10 ft (±10%) Type-C Cable
- Color: White
- Mounting: 360° Mounting Bracket, Wall Anchors
- Operating Temperature: -4 and 158°F (-20 and 70°C)
- Relative Humidity: 60% Max. (non-condensing)
- Case Material: Ethylene Tetrafluoroethylene (ETFE), Ethylene-Vinyl Acetate (EVA)
- Weather Proofing: IP67
- Regulatory: FCC, IC, EMC, ROHS, CE
GeoAlarm GeoSOL Solar Panel Installation:
1. Choose a location for the installation of your GeoSOL Solar Panel. The ideal location receives sunlight throughout most of the day.
2. Use the bracket as a guide and determine where the screws will be placed. Mark the location.
3. If installing into concrete, brick, or stucco, use a power drill and drill bit to make the holes for the screws. If installing into the wood, use a screwdriver and the included screws to start the holes.
4. Place the bracket onto the home, lining up the holes with the bracket.
5. Install the bracket using the included screws and tighten it.
6. Place the GeoSOL Solar Panel on the bracket, lining up the screw with the insert on the back of the Solar Panel. Twist the Solar panel to complete the bond, and twist the screw nut on the bracket to secure the Solar Panel in place.
7. Use the handle on the GeoSOL Solar Panel to adjust the angle to the desired position.
8. Now that your GeoSOL Solar Panel is installed, open the bottom cover on the GeoCAM Camera, and plug in the USB cable.
GeoAlarm GeoSOL Solar Panel Powering Options:
- Rated Power: 5W (5.5V, 0.9A)
- Support: Battery Doorbell Camera, Battery Camera
- Charging Limitations: Cannot be used in temperature below 32° (1°C)
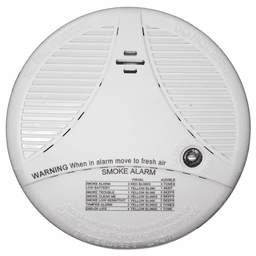
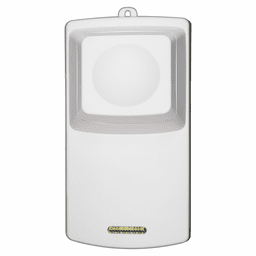
▼ GeoSeries® Encrypted Security Sensors ▼

List Price: $23.97
Our Price: $15.98

List Price: $26.97
Our Price: $17.98
Delivery*
Free for orders $200 & above!
Free for orders $200 & above!

List Price: $43.47
Our Price: $28.98
Delivery*
Free for orders $200 & above!
Free for orders $200 & above!

List Price: $59.97
Our Price: $39.98
Delivery*
Free for orders $200 & above!
Free for orders $200 & above!

List Price: $31.47
Our Price: $20.98
Delivery*
Free for orders $200 & above!
Free for orders $200 & above!
List Price: $134.97
Special Order: $89.98
Delivery*
Free for orders $200 & above!
Free for orders $200 & above!

List Price: $113.97
Our Price: $75.98
Delivery*
Free for orders $200 & above!
Free for orders $200 & above!
List Price: $187.47
Special Order: $124.98
Delivery*
Free for orders $200 & above!
Free for orders $200 & above!

List Price: $32.97
Our Price: $21.98
Delivery*
Free for orders $200 & above!
Free for orders $200 & above!

List Price: $23.97
Our Price: $15.98
Delivery*
Free for orders $200 & above!
Free for orders $200 & above!
List Price: $134.97
Special Order: $89.98
Delivery*
Free for orders $200 & above!
Free for orders $200 & above!
List Price: $94.47
Our Price: $62.98
Delivery*
Free for orders $200 & above!
Free for orders $200 & above!
▼ GeoAlarm Video Surveillance Products ▼

List Price: $251.97
Our Price: $167.98
Delivery*
Free for orders $200 & above!
Free for orders $200 & above!

List Price: $284.97
Our Price: $189.98
Delivery*
Free for orders $200 & above!
Free for orders $200 & above!

List Price: $251.97
Our Price: $167.98
Delivery*
Free for orders $200 & above!
Free for orders $200 & above!
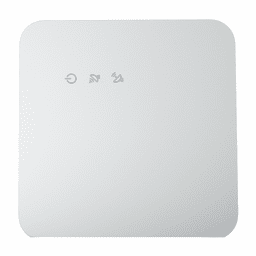
▼ GeoAlarm Home Automation Devices ▼


Questions & Answers


