
Delivery*
Free for orders $200 & above!
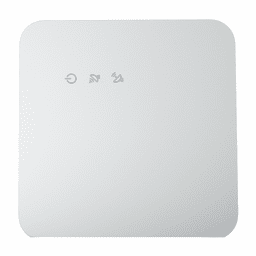
GeoCT - GeoAlarm Wireless GeoSeries Encrypted Door/Window Alarm Contact
GeoSeries GeoCT Contact Description:
The GeoCT is a wireless GeoSeries® encrypted door/window contact with a magnetic sensor designed to fit seamlessly alongside a door frame or windowsill. When the door or window are opened more than 0.25 inch from each other, the GeoCT magnetic contact becomes disrupted. When disrupted, the GeoCT sensor will then transmit an alarm notification to the GeoAlarm control panel (GeoCP-AT/GeoCP-VZ), end-user, and/or GeoArm central monitoring station informing everyone selected of an alarm initiating event.
Easy to install on anything that opens, the GeoCT boasts an impressive wireless range of up to 820 feet away from the control panel. The contact can be installed using either the included 3M adhesive tape or M3 x 16mm screws. The sensor and magnet should be placed near the top of the door with the sensor attached to the unmoving part of the closure.
Before installing the GeoCT sensor, be sure to not install it near any heat sources such as radiators, heat registers, stoves, or other apparatus (including amplifiers) that produce heat. Do not expose the sensor to water. When there is a low battery, replace with a compatible CR2032 lithium ion battery.
Product Features:
- Encrypted GeoSeries® wireless technology
- Transmits tamper and low battery alarms
- 5 years battery life
GeoSeries GeoCT Contact Specifications:
- Sensor Dimensions (W x H x D): 1.69 x 2.52 x 0.51 in. (43 x 64.05 x 13 mm)
- Wireless Signal Range: 820.21 ft. (250 m)
- Transmitter Frequency: 433 MHz
- Encrypted: Yes
- Transmitted Indications: Tamper, Low Battery
- Battery Type: CR2032 (220mAh)
- Battery Life: 5 years
- Screw Size: M3 x 16mm
- Adhesive: 3M 4930
- Operating Temperature: 32 to 122.6°F (0 to 50°C)
- Relative Humidity: 85% max
- Supervision: Yes (60 minutes heartbeat)
- Water Resistant: No
GeoSeries GeoCT Contact Installation:
The GeoCT door/window sensor can be installed using the provided adhesive or screws.
Mounting Orientation:
The sensor and magnet should be placed near the top of the door with the sensor attached to the unmoving part of the closure. For example, attach the main body of the sensor to the door frame, not the door. We recommend that the sensor is placed in the top corner of the opening of the door.
The sensors and magnet each have a slightly engraved line. This line denotes where the sensors align to function properly. If the sensor and magnet, when together/closed, do not line up correctly, the sensor will not report correctly.

To install the door/window sensor:
1. Select the desired position for the sensor and magnet. The sensor and magnet must be within 0.25 inch of each other on final installation. Verify that the sensor and magnet are aligned correctly.2. Remove the sensor's battery pull tab.
3. Adhere the sensor to the wall using the provided screws and/or adhesive. We recommend using the provided screws for installation. This method is more secure than using adhesive.
Using Screws
a. Locate the bottom of the sensor (the slotted short end).
b. Turn the sensor over, and then gently slide a fingernail/fingertip into the slot pushing the sensor's back plate up and away from the sensor body. (You can see the FCC label on the inside of the back plate.)

c. Remove the adhesive film cover. (Optional)

d. Place the back plate against the door frame/windowsill, making sure that the orientation is correct for the desired position. Take note, once the adhesive is secure the sensor cannot be moved. (Optional)
e. Mark the screw hole locations, then using a power drill, drill holes and install the 2 provided wall anchors.
f. Insert the first screw into the non-breakaway screw hole, and then use a screwdriver to partially secure the screw in the wall. Do not fully insert the screw until the second screw has secured the sensor position.
g. Insert a second screw into the breakaway screw hole, and then partially secure in the wall.

h. Obsert the sensor position. When satisified with the position, use a screwdriver to fully secure each screw in the wall.
i. Press the front of the sensor against the base, until there is an audible snap.
Using Adhesive
a. Select the desired position for the sensor.
b. Peel one side of the adhesive tape, and then press the tape firmly against the sensor. Take note, once the adhesive is secure, the sensor cannot be moved.

c. Peel the other side of the adhesive, and then press the sensor against the wall.
4. Line the magnet up with the sensor, verifying that they align properly, and then adhere the sensor to the wall using the provided screws or adhesive.
Using Screws
a. Locate the bottom of the magnet (the slotted short end).

b. Turn the magnet over, and then gently slide a fingernail/fingertip into the slot pushing the magnet's back plate up and away from the magnet body.

c. Remove the adhesive's film cover (Optional), and then place the back plate against the door/window, making sure that the orientation and alignment are correct for the desired position. Take note, once the adhesive is secure, the magnet cannot be moved.

d. Mark the screw hole locations, then using a power drill, drill holes and install the 2 provided wall anchors.
e. Insert the first screw into a screw hole, and then use a screwdriver to partially secure the screw in the wall.
f. Insert a second screw into the remaining hole, and then partially secure in the wall.

g. Observe the magnet position. When satisfied with position, use a screwdriver to fully secure each screw in the wall.
h. Press the front of the magnet against the base, until there is an audible snap.
Using Adhesive
a. Select the desired position for the magnet.
b. Peel one side of the adhesive tape, and then press the tape firmly against the magnet. Take note, once the adhesive is secure, the magnet cannot be moved.

c. Peel the other side of the adhesive, and then press the magnet against the wall.
5. Add the sensor to the panel.
6. Once added, test the sensor. Verify that when the door/window is opened that the panel notes that the sensors is faulted. Take note, testing all sensors with the GeoArm alarm monitoring station is strongly advised.

GeoSeries GeoCT Contact Battery Replacement:
The GeoCT door/window sensor requires a CR2032 battery. Once the battery is low, the GeoCP panel displays a low battery icon next to the sensor in the devices list. The battery must be replaced within 7 days of the first low battery notification. If the battery is not replaced within 7 days, the sensor may not function properly.
To Replace the Battery:
1. Locate the bottom of the sensor (the slotted short end).2. Gently slide a fingernail/fingertip into the slot and pull the sensor cover out and away from the sensor's base.

3. The sensor containing the battery and circuit board is no longer attached to the door/window. Locate the tab holding the circuit board in the sensor.

4. Press and hold the tab away from the circuit board, and then turn the sensor over. The circuit board comes free from the sensor shell.
5. Use a fingernail/fingertip to push the battery out of the casing, noting the polarity of the battery.

6. Slide a new CR2032 battery into the battery casing, making sure that the polarity is correct.
7. Press the circuit board back into the sensor casing until secure. There will be an audible snap.
8. Press the sensor back onto the base.
9. Test the sensor.
Warning: If an incompatible replacement battery is used, or the battery is installed incorrectly explosion or damages may occur.
▼ GeoSeries® Encrypted Security Sensors ▼

List Price: $26.97
Our Price: $17.98

List Price: $43.47
Our Price: $28.98
Delivery*
Free for orders $200 & above!
Free for orders $200 & above!

List Price: $59.97
Our Price: $39.98
Delivery*
Free for orders $200 & above!
Free for orders $200 & above!

List Price: $31.47
Our Price: $20.98
Delivery*
Free for orders $200 & above!
Free for orders $200 & above!
List Price: $134.97
Special Order: $89.98
Delivery*
Free for orders $200 & above!
Free for orders $200 & above!

List Price: $113.97
Our Price: $75.98
Delivery*
Free for orders $200 & above!
Free for orders $200 & above!
List Price: $187.47
Special Order: $124.98
Delivery*
Free for orders $200 & above!
Free for orders $200 & above!

List Price: $32.97
Our Price: $21.98
Delivery*
Free for orders $200 & above!
Free for orders $200 & above!

List Price: $23.97
Our Price: $15.98
Delivery*
Free for orders $200 & above!
Free for orders $200 & above!
List Price: $134.97
Special Order: $89.98
Delivery*
Free for orders $200 & above!
Free for orders $200 & above!
List Price: $94.47
Our Price: $62.98
Delivery*
Free for orders $200 & above!
Free for orders $200 & above!
▼ GeoAlarm Video Surveillance Products ▼

List Price: $251.97
Our Price: $167.98
Delivery*
Free for orders $200 & above!
Free for orders $200 & above!

List Price: $284.97
Our Price: $189.98
Delivery*
Free for orders $200 & above!
Free for orders $200 & above!

List Price: $251.97
Our Price: $167.98
Delivery*
Free for orders $200 & above!
Free for orders $200 & above!

List Price: $52.47
Our Price: $34.98
Delivery*
Free for orders $200 & above!
Free for orders $200 & above!
▼ GeoAlarm Home Automation Devices ▼


Questions & Answers
Product Reviews
Compact Design!, March 17, 2024
Posted By: Emily Taylor
34 people found this review helpful
I recently purchased another GeoAlarm wireless door and window contact for my system and I must say, I am thoroughly impressed! The compact size of the device was a pleasant surprise compared to other contacts out there, making it unobtrusive and perfect for my home decor.
Geo-CT. Easy like Sunday Morning!, November 9, 2023
Posted By: Gregor H
50 people found this review helpful
Let me tell you about this nifty GeoCT - GeoAlarm Wireless Door/Window Contact?oh, it's a gem! Installing it was as easy as pie, no headache involved. It's like having a little guardian for my doors and windows, keeping an eye out for any mischief. If a door or window opens, it lets out a little beep, like a friendly reminder to stay on guard. Simple and brings a bit of peace to my family and myself.


