GeoTSLR - GeoAlarm Wireless GeoSeries™ RF Alarm Translator (for Wired and Wireless 345 MHz Security Sensors)
- Description
- Specifications
- Add to Panel
- Enrollment
- 345 MHz Sensors
- Wired Sensors
- Reset
- Translate
- Knob
- LED
- Buzzer
- Compatible
GeoTSLR Product Description:
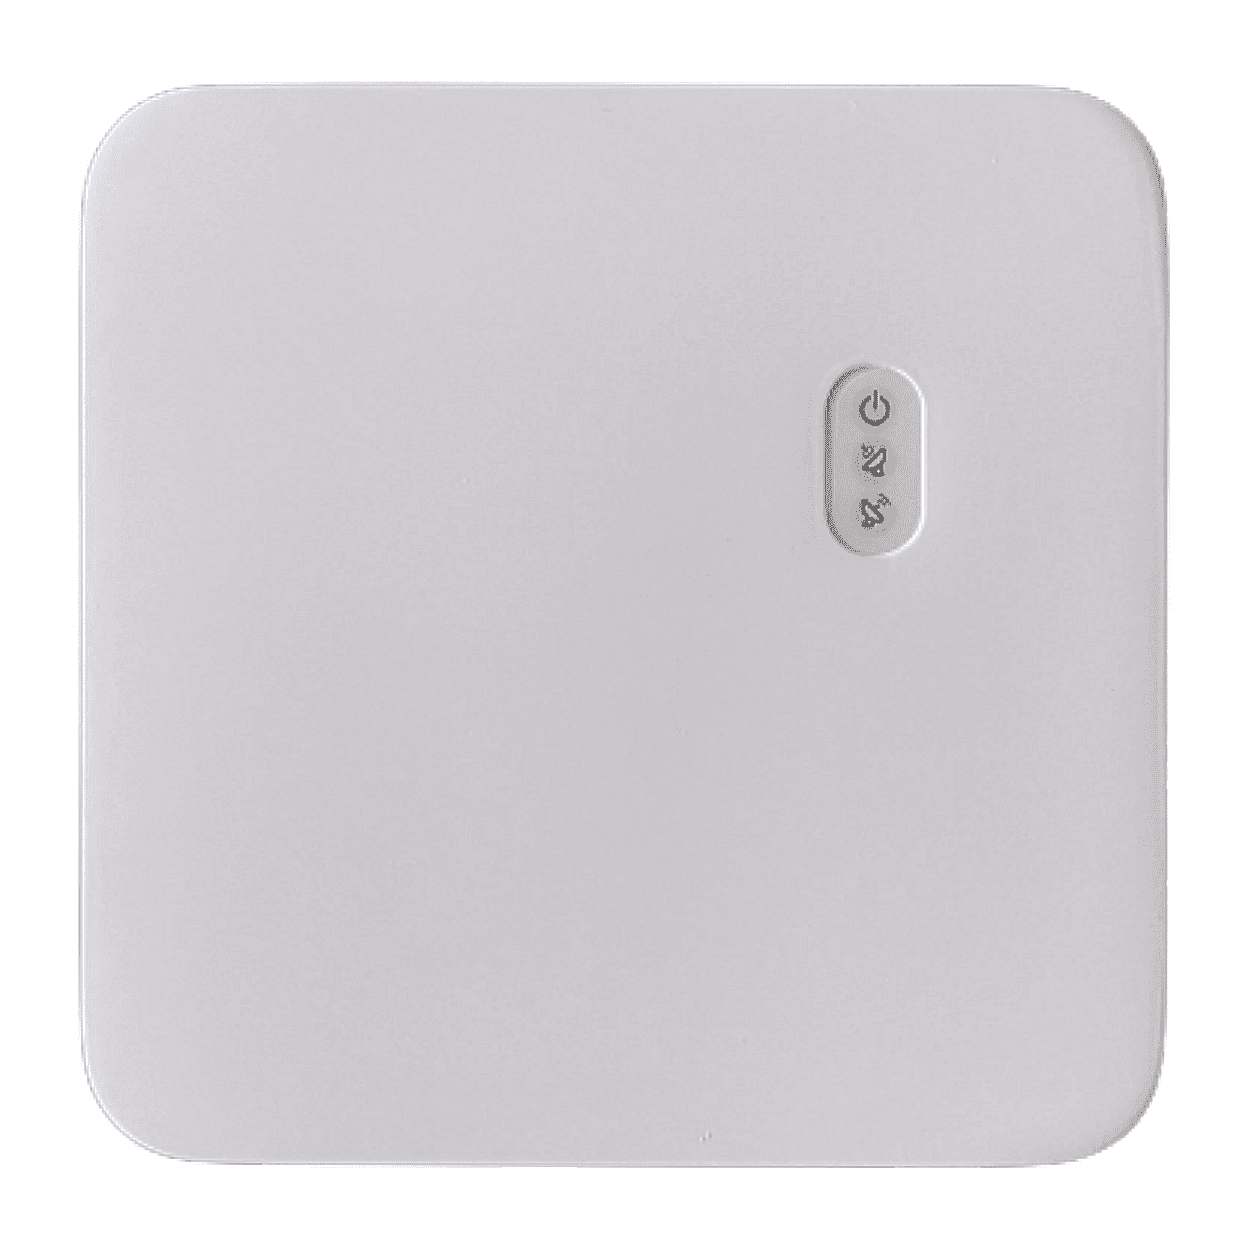
The GeoTSLR is a wireless translator that allows for the integration of various wireless and wired sensors into the GeoAlarm control panel (GeoCP). It enables the user the ability to expand the capabilities and performance of their home or business security setup. The GeoTSLR bridges the communication gap between different sensors utilizing the wireless 345 MHz freqency to transmit signals, and wired sensors connected to the appropriate terminals on the translator.
When installing the GeoTSLR the front of the translator should be facing the the GeoCP panel LCD. The GeoCP panel should be installed at a height of 4.92 feet and the GeoTSLR translator should be installed at a height of 3.93 feet. The location of the translator can have a significant effect on range. In open/unobstructed situations, the transmitter range may be greater. In adverse wireless conditions, you may encounter a decrease in range. The RX range is dependent on sensor capabilities.
Product Features:
- LEDs - Rx Transmission, Tx Transmission, Power, & Configure
- Button Actions - Pairing, Sensor Select, & Configure
- Supported Sensors - 2GIG, Honeywell, Unencrypted
- Maximum Enrollments - 64 Wireless Sensors, 2 Hardwired Sensors
Please Note: The GeoTSLR translator is not approved for use with life safety devices such as; smoke detectors, heat detectors and carbon monoxide detectors.
GeoTSLR Product Specifications:
Dimensions
- Height: 4.56" in.
- Width: 4.52" in.
- Depth: 1.02" in.
Technical Specs
- Model: GeoTSLR
- Tamper: Yes
- LEDs: x4
- Button: x3
- Wired: Yes, Support Hardwired Sensors
- Case Material: ABS
- Color: White
- External Power Supply: 12VDC 1A, 100 - 240VAC 50/60Hz, UL Certified
- Current Draw: Output 12VDC max., 80mA for Wired Sensors
- Backup Battery: x1 - 2000mAh 3.6V Li-ion Battery
- Backup Battery Life: Min. 24 Hrs. for Non-powered Zones, Min. 4 Hrs. for Powered Zones
- Operating Temperature: 32 and 120°F (0 and 49°C)
- Weather Proofing: N/A
- Regulatory: FCC, IC (TBC)
Connectivity
- Transmitter Frequency: Rx 345MHz, Tx 433MHz
- Tx Wireless Signal Range: up to 656 ft, open air, with GeoCP Security Panel*
- Rx Wireless Signal Range: up to 492.12 ft, open air, with GeoTSLR Translator*
- Modulation: OOK
- Encryption: Yes, 345MHz (unencrypted) to 433MHz (encrypted)
- Frequency Hopping: N/A
- Supervision: Yes, ≈ 60 minutes
GeoTSLR Adding to Panel:
1. Select the sensor type as "Translator".
2. To initiate pairing, activate the tamper switch on the translator by pressing the "Open" button and lifting the lid.
3. Confirm the translator's serial number (SN) on the panel display.
4. Assign a name to the translator for easy identification.
5. Note that the translator's SN should end with either a 0 or a 5 for proper configuration.
GeoTSLR Enrollment Mode:
Once you have enrolled your sensors into the translator, you need to properly exit enrollment mode to ensure that all settings are saved and the system is ready for normal operation. Follow these steps to exit enrollment mode:
- After enrolling your wireless or wired sensors, press the "Configure" button on the translator to manually exit enrollment mode.
- If no action is taken, the translator will automatically exit enrollment mode 10 minutes after the last sensor is enrolled or immediately when the translator cover is closed (which restores the tamper condition).
- When enrollment mode is exited, the "Configure LED" will turn off, indicating that the translator is no longer in enrollment mode and is ready for regular operation.
GeoTSLR Enroll Wireless 345 MHz Sensors:
Enrolling Wireless 345 MHz Sensors into Translator
Steps for Enrolling Wireless Sensors:
1. Ensure the translator is powered and the battery is connected.
2. Position the switch knob according to the brand of sensor (0 for 2GIG, 1 for Honeywell).
3. Enter enrollment mode by pressing the "Configure" button, activating the blue LED indicator.
4. Trigger each wireless sensor to enroll; the buzzer will beep, and the LED will flash green for each successful addition.
5. Verify that no red LED indicates duplication.
6. Exit enrollment mode after completing sensor additions.
Add Wireless 345 MHz Sensors to the Panel
After enrolling a wireless 345MHz sensor into the translator, follow these steps to add it to the GeoCP panel:
1. Ensure that the wireless sensor has been enrolled into the translator (as per the instructions in this guide).
2. On the GeoCP panel, go to the "Add Devices" page and select the appropriate sensor type for the 345 MHz sensor.
3. Trigger or tamper the enrolled sensor to send its signal to the panel.
4. Confirm the sensor's serial number (SN) on the panel, which should now display the correct information.
5. Assign a unique name to the sensor for identification in the system.
GeoTSLR Enroll Wired Sensors:
Enrolling Wired Sensors into Translator
To add wired sensors to the GeoTSLR RF Translator, ensure you perform the following:
1. Connect the wired sensor's leads to the appropriate terminals on the translator.
2. Set the translator into enrollment mode by ensuring the switch knob is in the correct position and pressing the 'Configure' button, indicated by the blue LED light.
3. Activate each wired sensor to register its signal with the translator. The 'Buzzer' will sound once, and the 'Configure LED' will turn green, signifying successful enrollment.
4. Exit enrollment mode after completing sensor additions.
Add Wired Sensors into Panel
For adding a wired sensor that has been enrolled by the translator to the GeoCP panel, these steps should be followed:
1. Connect the wired sensor to the appropriate terminals on the translator. Ensure that the connections are secure and correct according to the sensor's wiring requirements.
2. Proceed with enrolling the wired sensor into the translator, as detailed in the previous instructions.
3. On the GeoCP panel, navigate to the "Add Devices" page and select the sensor type that corresponds to the wired sensor you are adding.
4. Activate the wired sensor to send its signal to the translator, which will forward the information to the panel.
5. Confirm the sensor's serial number (SN) as it appears on the panel. The wired zone serial numbers will follow the translator SN in sequence (Translator SN=N, Wired Zone1 SN=N+1, Wired Zone2 SN=N+2, and so on).
6. Name the sensor in a way that will help you easily identify it within the system.
GeoTSLR Factory Reset:
Factory Reset Instructions
To reset the GeoTSLR RF Translator to factory settings, please follow these instructions carefully:
1. Press and hold the 'Configure' button and the 'Tamper' switch simultaneously for 10 seconds.
2. The translator will emit a long beep to signal the start of the reset process.
3. Release both the 'Configure' button and the 'Tamper' switch to proceed with the factory reset.
Important Notes:
Before Resetting - If you plan to discontinue use of the Translator, remember to remove the device from the GeoCP Security Panel before performing the factory reset to avoid any configuration issues.
Warning - Performing a factory reset will erase all connected sensors and their configurations from the translator. This process is irreversible, and caution should be taken to ensure that you wish to proceed as all previous settings will be lost.
GeoTSLR Signal Translate Logic:
The translator uses different logic for translating signals from 2GIG and Honeywell sensors:
2GIG Sensors
Since each sensor type has a unique type ID in the RF signal, the translator will match it to the correct sensor type compatible with the GeoCP panel.Honeywell Sensors
Given that all Honeywell sensor type IDs are 8, the translator will convert this to type ID 15, which the panel will recognize for various uses like door, window, keyfob, motion, glassbreak, and medical alerts.GeoTSLR Switch Knob Configuration:
The switch knob on the translator determines which sensor brand protocol to listen for:
- Position 0: Default for 2GIG 345MHz unencrypted sensors.
- Position 1: Default for Honeywell 345MHz unencrypted sensors.
- Position 2: Default for Alder 345MHz unencrypted sensors.
- Position 3-5: Reserved for other brands and future updates (TBD).
GeoTSLR Product LED Behavior:
Understanding the translator's LED indicators:
- Power LED: Indicates power status. Off when unpowered, green when power is connected.
- RX/TX LEDs: Show data reception (RX) and transmission (TX) status. No activity (N/A) by default, flashes blue when enrolling sensors, and turns red when full capacity is reached or when a duplicate sensor is detected.
- Configure LED: Signals the current mode of the translator. Flashes green when in enroll mode and red when the capacity for enrolled sensors is full or when a duplicate sensor is detected.
GeoTSLR Buzzer Behavior:
The translator provides audible feedback through the buzzer for different conditions:
- Single Beep: Indicates a sensor has been successfully enrolled.
- Double Beep: Alerts when a duplicate sensor is detected.
- Long Beep (3 seconds): Signifies that the translator has reached its maximum capacity of 64 sensors and cannot enroll more.
- Continuous Long Beep: Occurs during the factory reset process.
GeoTSLR Product Compatibility:
The compatibility list is not exhaustive and only includes sensors that have been specifically tested for compatibility with the GeoTSLR translator. The absence of a sensor from this list does not necessarily indicate incompatibility.
GeoAlarm
- GeoCP Control Panel
2GIG
- 2GIG-DW10-345 Wireless Door/Window Contact
- 2GIG-GB1-345 Wireless Glassbreak Detector
- 2GIG-PANIC1-345 Wireless Panic Button Remote
- 2GIG-PIR1-345 Wireless Motion Detector
- 2GIG-KEY2-345 Wireless 4-Button Remote Keyfob
- 2GIG-FT6-345 Wireless Water Leak Detector
Honeywell
- 5816OD Outdoor Wireless Door/Window Contact
- 5800PIR-RES Wireless Motion Detector
- 5802WXT Wireless Personal Panic Transmitter
- 5853 Wireless Glassbreak Detector
- 5834-4 Wireless 4-Button Remote Keyfob
- 5821 Wireless Temperature Sensor & Flood Detector
- FG-1625 Wired Glassbreak Detector
- IS3035 Wired Motion Detector
Alder
- DWS01 Wireless Door/Window Contact
- KF01 Wireless Remote Keyfob
- PIR-101 Wireless Motion Detector
- MP-101 Wireless Medical Button
- FS-101 Wireless Flood Sensor
- LP.DW01.345.1 Wireless Door/Window Contact
- LP.KEY02-345.1 Wireless Remote Keyfob
- LP.PIR02.345.1 Wireless Motion Detector
- LP.GP01-345 Wireless Glassbreak Detector
- LP.MED02.345.1 Wireless Medical Button
▼ GeoSeries™ Encrypted Security Sensors ▼


List Price: $23.97
Your Price: $15.98

List Price: $26.97
Your Price: $17.98


List Price: $59.97
Your Price: $39.98

List Price: $113.97
Back-Ordered: $75.98

List Price: $31.47
Your Price: $20.98

List Price: $32.97
Your Price: $21.98

List Price: $23.97
Your Price: $15.98
List Price: $251.97
Your Price: $167.98

List Price: $284.97
Your Price: $189.98


List Price: $52.47
Pre-Order: $34.98

▼ GeoAlarm Video Surveillance Products ▼
▼ GeoAlarm Home Automation Devices ▼


